Introduction #
The document is a user guide for the TrustiSite PCI Scanning Product Web Comply. Web Comply is provided by our partners Sectigo and Qualys, who are approved Scanning Vendors (see below). This product is also known as Hacker Guardian and the terms Web Comply and HackerGuardian are used interchangeably.
Scope #
The current scope of the document includes usage specification of the PCI Scan Portal which is built on co-branded Sectigo Qualys Platform. PCI Council mandates that External Scan for PCI Compliance for any merchant is required to be done by an ASV (Approved Scanning Vendor). ASVs are certified by PCI Council annually. Sectigo has been consistently qualifying as an ASV for more than 10+ Years and has the authority to issue External Scanning Certification to qualifying merchants via HackerGuardian or Web Comply PCI Scan Portal.
Web Comply #
The PCI DSS otherwise called the Payment Card Industry Data Security Standard has been formulated by the five major credit card companies VISA, MASTERCARD, AMERICAN EXPRESS, DISCOVER and JCB to mitigate risks involved through online purchases and transactions and prevent data loss and massive security breaches.
The PCI standards are for companies that handle credit card payments – that is accept, processes and store credit card payments and data. The companies must handle credit card data securely with a hosting provider that is PCI compliant.
PCI scan is a solution to help companies of all size to adhere to PCI DSS requirements. HackerGuardian PCI Scanning enables merchants to achieve PCI Compliance using the full complement of HackerGuardian test suites (over 50 thousand individual vulnerability tests). The HackerGuardian Additional IP Address Pack allows HackerGuardian to grow with their external PCI scanning needs. The key benefits of TrustiSite’s Web Comply solution are:
- Achieve PCI scan compliance as well as vulnerability scanning by a reputed PCI Approved Scanning Vendor
- Get ‘Ready-to-submit’ PCI Compliance reports to send to your merchant bank
- Detailed reports identify security holes exposed by HackerGuardian’s 50,000+ tests and contain actionable fix recommendations
- Secure web-based interface allows you to schedule unlimited PCI scans per quarter.
- IP Address Packs can be added to your license to allow you to scan additional external IP addresses
- Our external vulnerability scans are performed in accordance with PCI DSS Requirement 11.2.2
Purchase and Account Activation #
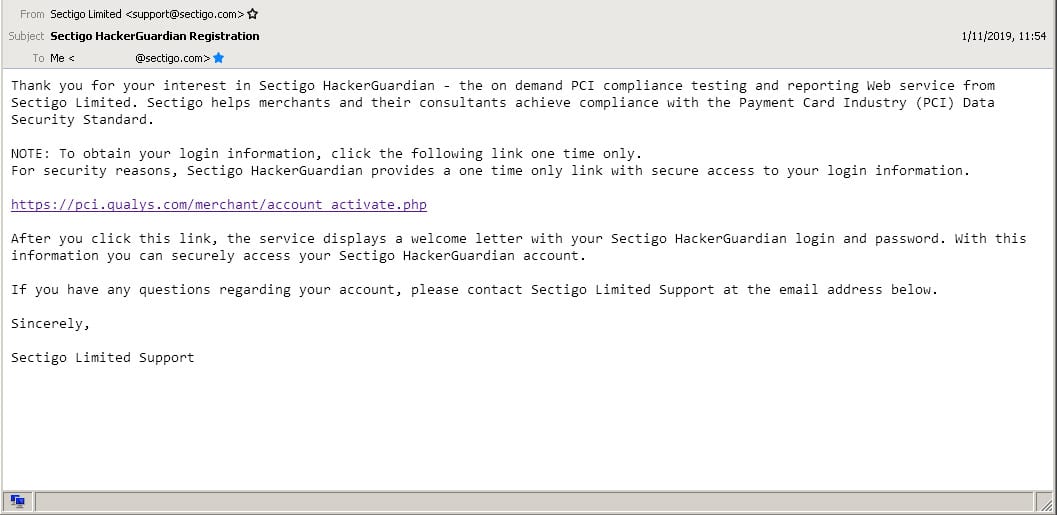
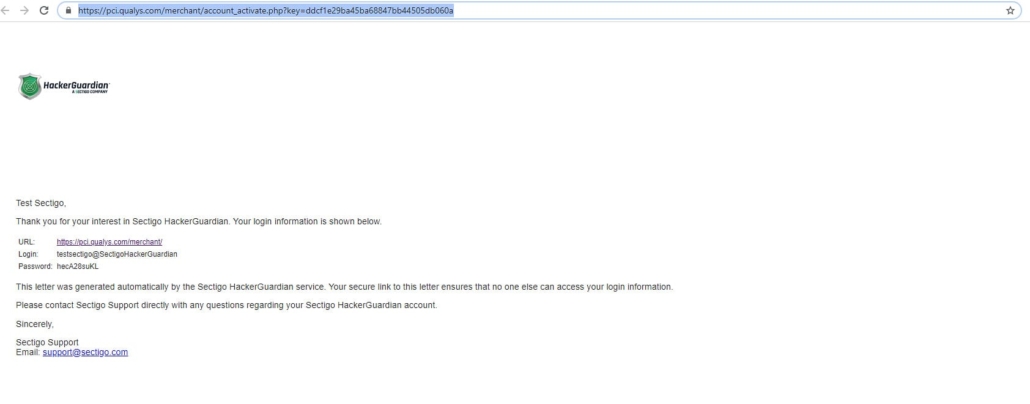
After purchasing a new license, you will receive an account activation email like the one below. If you do not receive this email, please check your spam folder before contacting support. Clicking on the unique link within the email will activate your account and provide you with the credentials for the portal. Note that these credentials are specifically for PCI Scan Portal which is different to the Trust365 account portal and the TrustiSite login.
Portal Login #
Please bookmark the login for the PCI Scan portal https://pci.qualys.com/merchant/
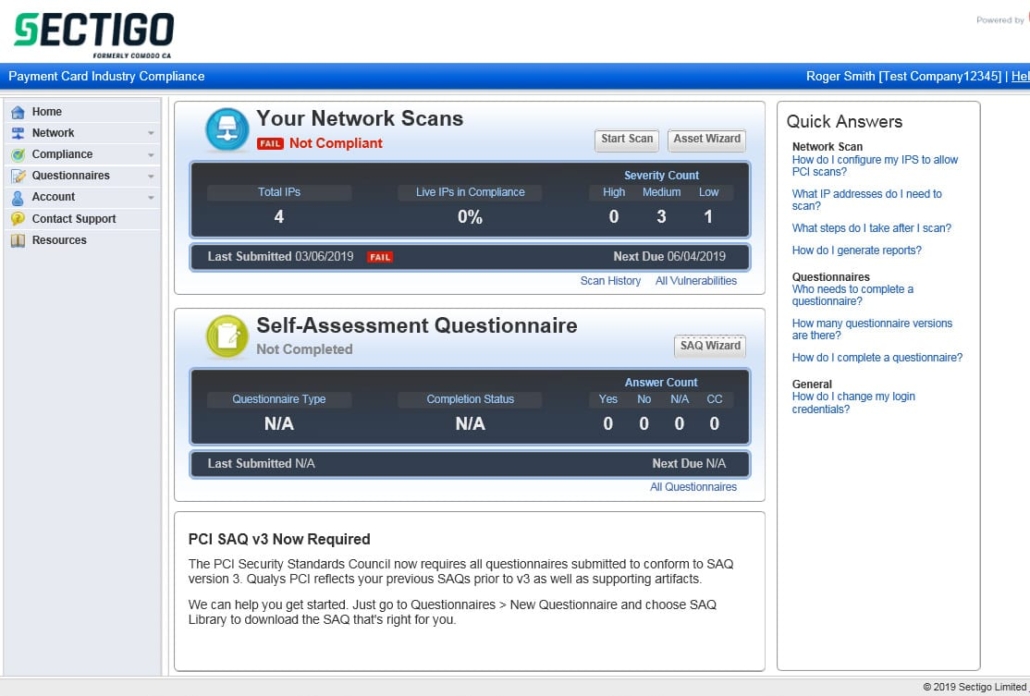
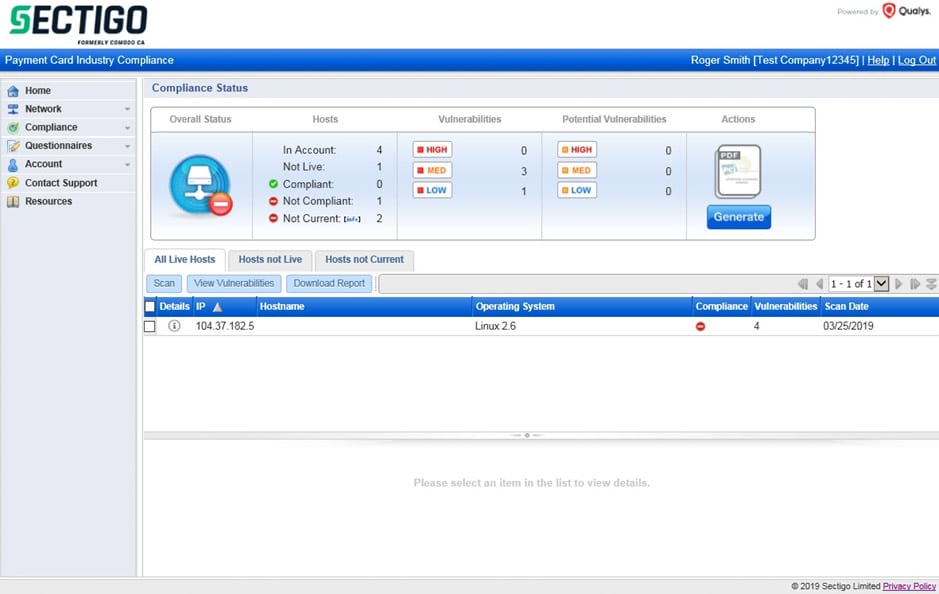
Once logged in you will see the new portal with an overview of your status.
Managing IP Addresses #
Adding IP Addresses #
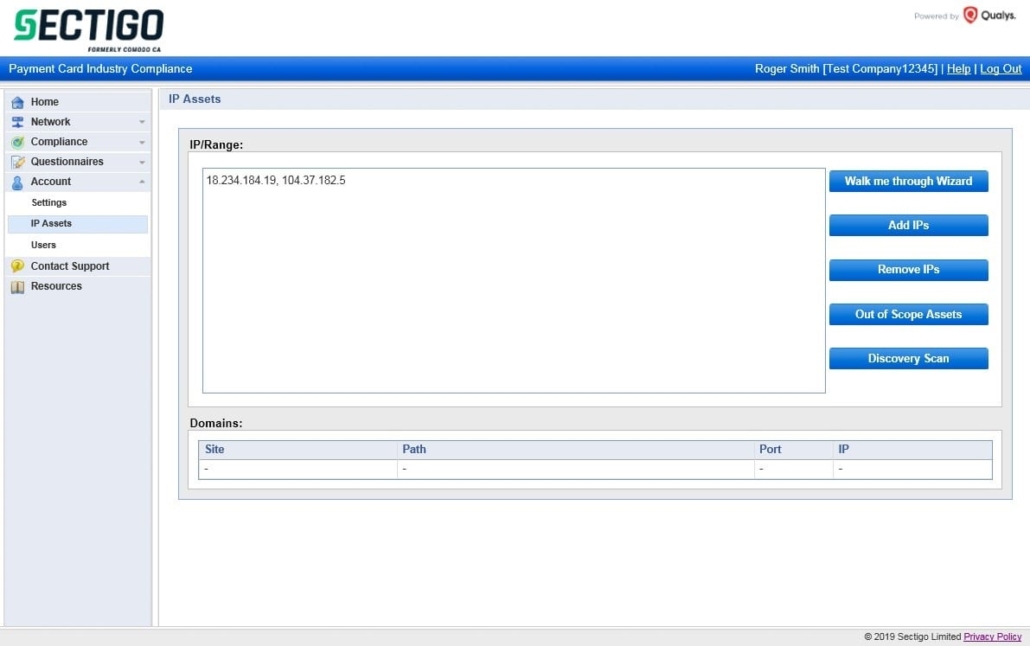
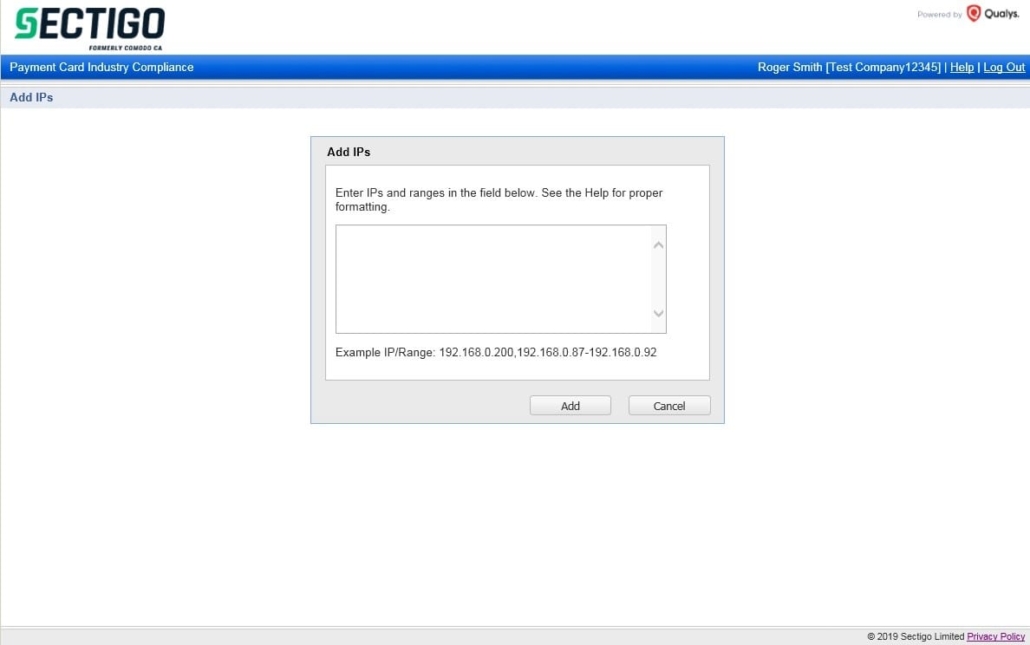
Within the HackerGuardian portal click “Account” then “IP Assets”. Click “Add IPs” to add IP Addresses or IP Address ranges. IP Address can also be added automatically when running a new scan.
Deleting IP Addresses #
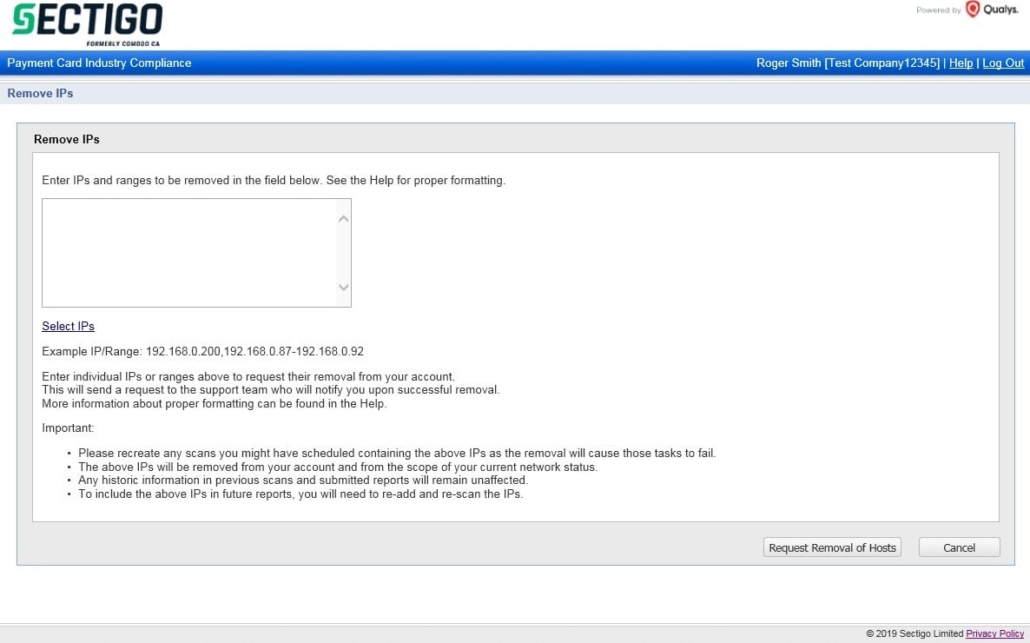
Within the HackerGuardian portal click “Account” then “IP Assets”. Click “Remove IPs” and then enter the IP Addresses you wish to remove.
Adding Domains #
There are two methods of adding domains to an account. The default method resolves the domain name to an IP Address and then when the IP Address is scanned the associated domain is listed in the report. Domains can also be scanned directly for cases such as a server using dynamic IP Addresses.
Direct scanning is not enabled by default so please contact your Product Support to have “scan by DNS” enabled on your account.
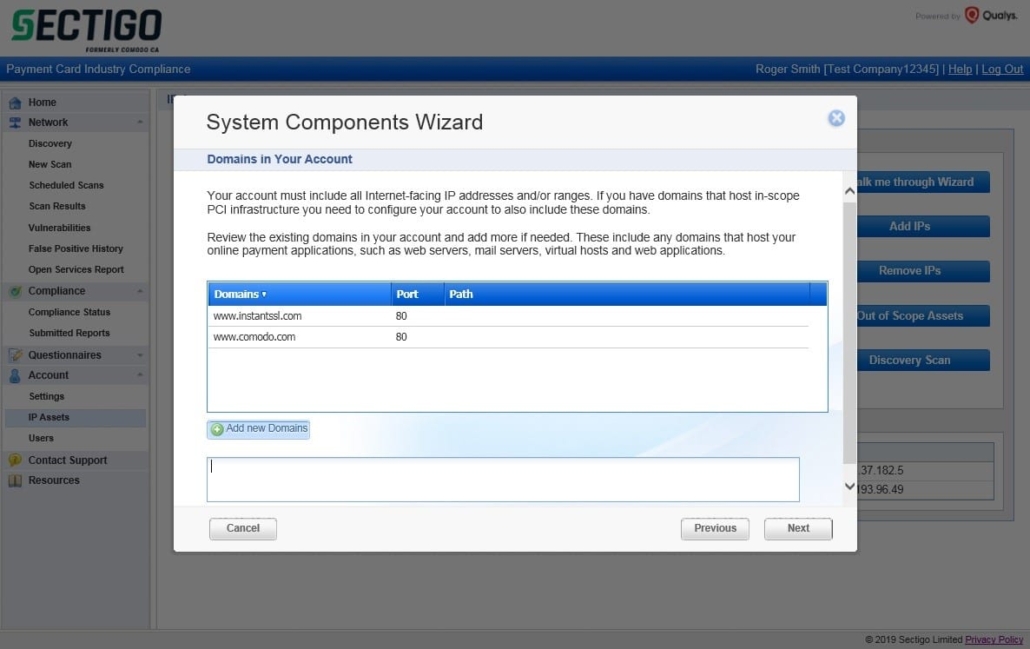
To add domains via the default method, click “Walk me through the Wizard” click “next” then “next” again. Then click “Add new domains” and set the domains you own. The IP Addresses of these domains are resolved and will be listed in the IP Address list. When starting a new scan, the resolved IP Address is listed. The path to a particular location which requires scanning can also be added such as www.example.com/index.html.
Starting Scans #
Within the HackerGuardian portal click “Network” then “New Scan” to add new IP Addresses, select existing IP Addresses to scan or scan all IP Addresses. A title to identify the scan must be supplied. The bandwidth of the scan may be selected which can be used to increase the scan speed or reduce the load the scan generates on the server being scanned. You may also start the scan straight away (Launch Now) or schedule the scan for a later date (Schedule for Later). If you select “Launch Now” you will be redirected to the page displaying the scan progress.
Scanner IP Address range: 64.39.96.0/20 (64.39.96.1-64.39.111.254)
The new scanner address range should be whitelisted when scanning through the new portal.

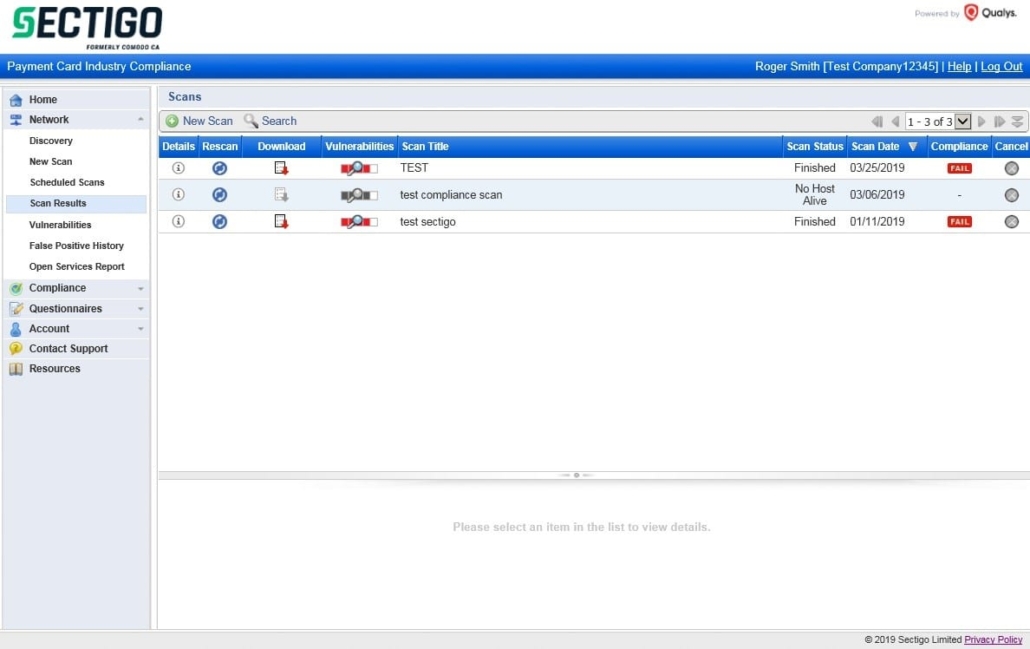
Viewing Reports #
Within the HackerGuardian portal click “Network” then “Scan Results”. The full report can be viewed as a PDF by clicking the download icon in the “Download” column of the table. To view a list of the vulnerabilities that require action click the icon in the “Vulnerabilities” column. The executive summary report is only available after submitting your attestation of scan compliance. Please see the “Generate Attestation of Scan Compliance, Detailed report and Executive Summary” section for details on how to do this.
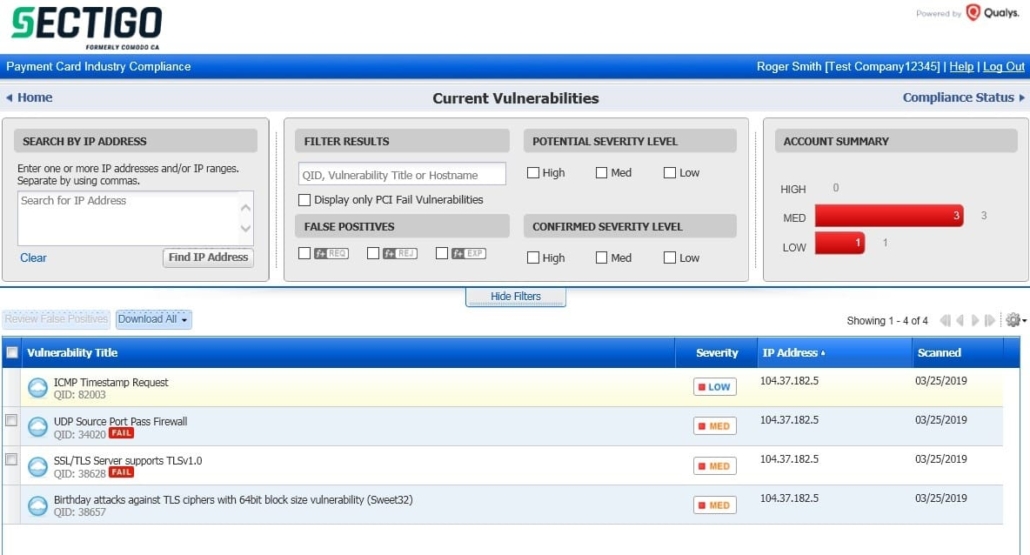
Reporting False Positives #
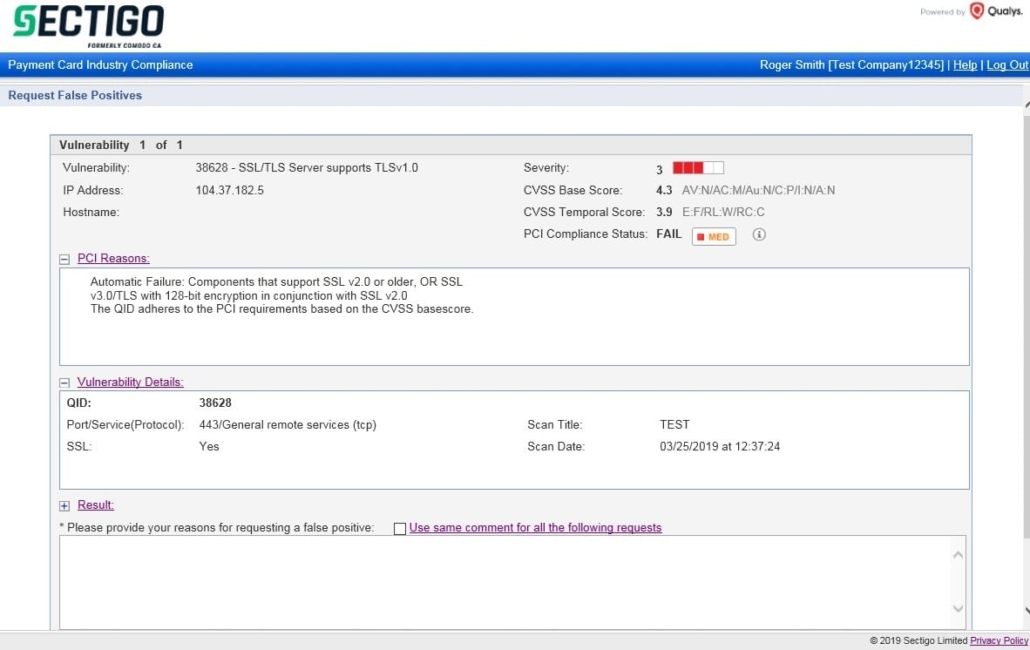
Within the HackerGuardian portal either click “Network” à”Scan Results” à Vulnerabilities icon in the “Vulnerability” column of table to select an IP Address or click “Network” à”Vulnerabilities” for a full list. Use the far-left checkbox to select the false positives you want to report and then click “Review False Positives”.
A detailed explanation as to why this is a false positive or description of the compensating controls implemented must be provided. The submitted information is reviewed by an ASV Qualified Employee before being accepted or rejected. If accepted the vulnerability no longer affects the report status.
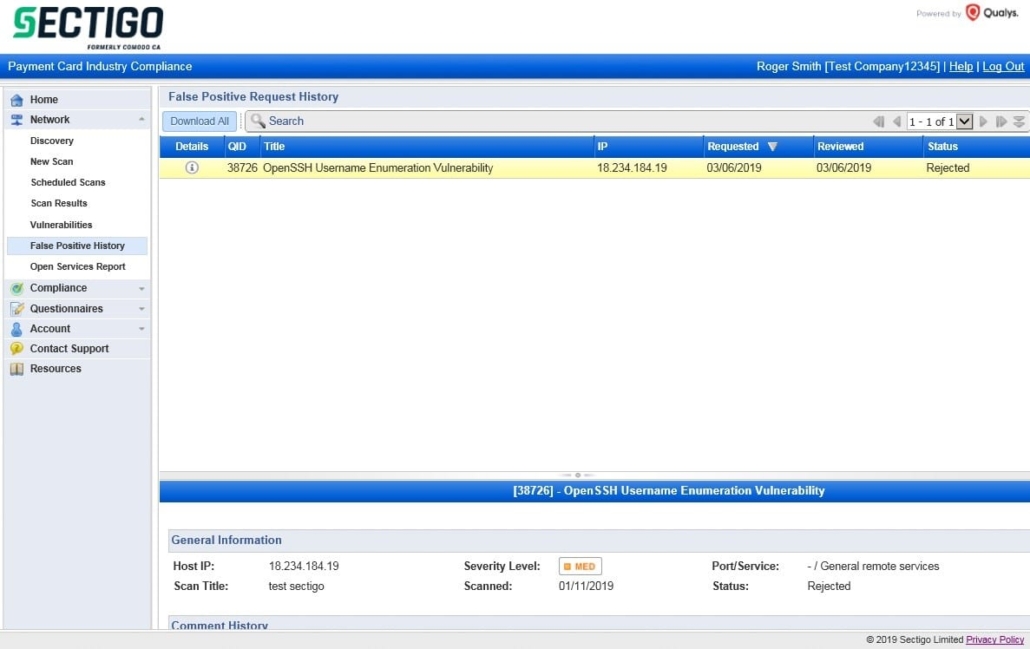
View the false positive status and history at “Network” then “False Positive History”.
Attestation of Scan Compliance, Detailed Report, and Executive Summary #
Within the HackerGuardian portal click on “Compliance” à “Compliance Status” à “Generate” button under “Actions”. The IP Addresses included in the report are listed in the table on this page. IP Address will not gain a compliant status if it has not been scanned in the last 30 days. This is not a change in the compliance process which specifies a 90-day limit but is intended to follow PCI best practice.
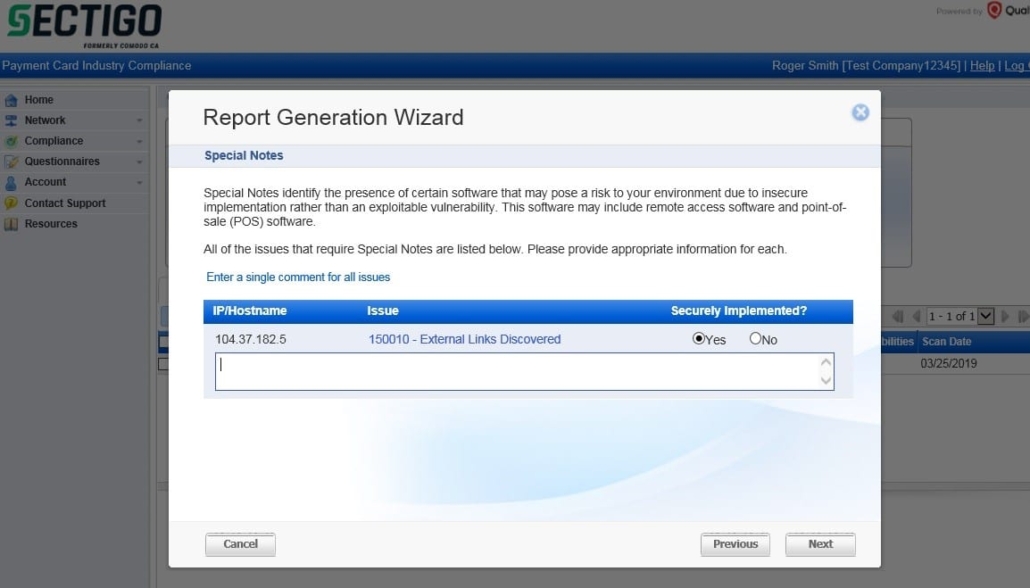
For each special note found, a submission must be made to ensure the service is securely implemented. This information requested must be provided for a Compliant report to be issued. Optionally additional comments may be added for non-compliant IP Addresses. Out of scope IP Addresses may be confirmed on the final popup of the attestation. The name and title to appear on the Attestation of Scan Compliance must be provided. You may decide to submit the report now or save it for later. Reports saved for later may be submitted by clicking “Compliance” à”Submitted Reports” and under “Next Action” click the “Request Review” link.
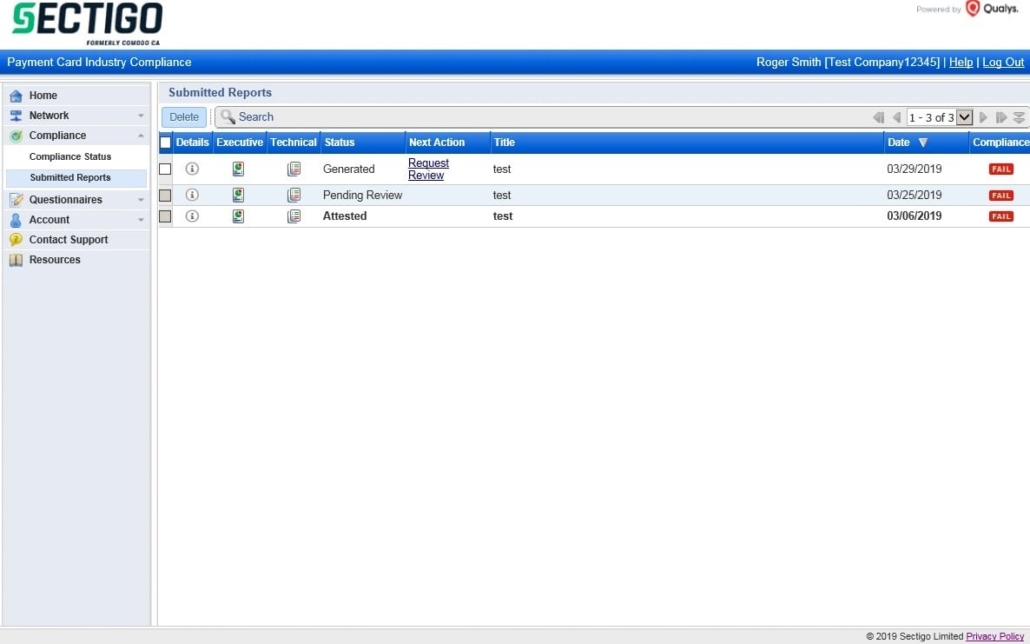
Once a report has been requested the status can be reviewed by clicking on “Compliance” à “Submitted Reports”. The status may be:
- Attested: The report has been reviewed and issued. The report may then be provided to your Acquirer to prove compliance with the PCI DSS ASV scan requirement.
- Pending Review: The report has not yet been reviewed by a Sectigo ASV qualified employee.
- Generated: The report has not yet been submitted for review.
- Rejected: An issue has been detected with the reports or information submitted during the attestation. The feedback on the rejection will be provided via email to account contact.
The executive summary, detailed report and attestation of scan compliance are contained in a single PDF called the Technical report. A separate executive summary report is also available to download. This document should be provided to your acquirer after approval as part of the PCI Compliance process.
Sample PCI Technical Report #

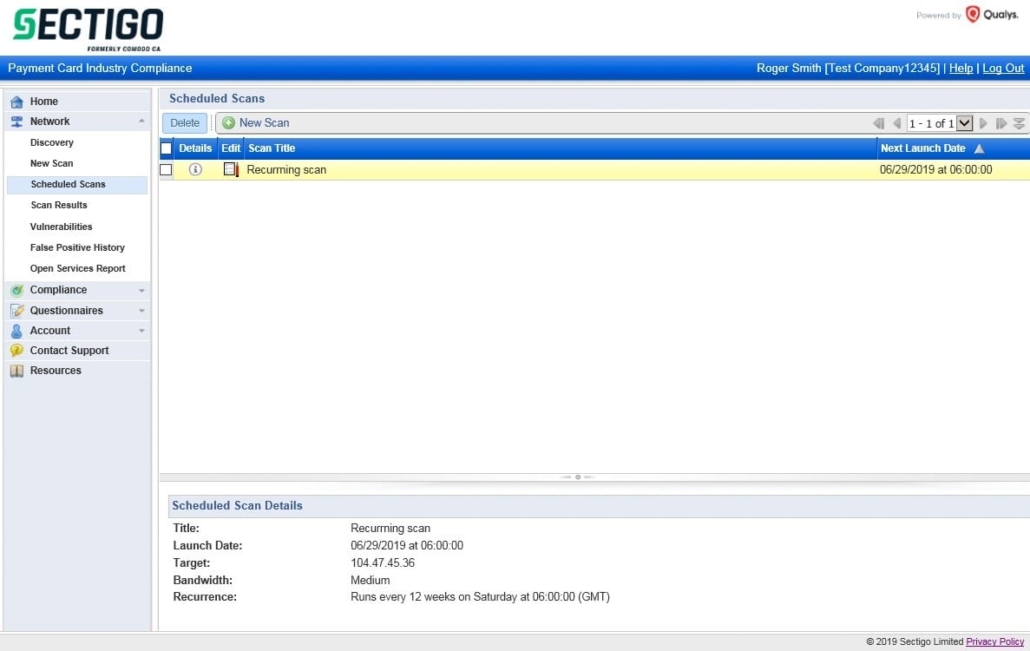
Create a Scan Schedule #
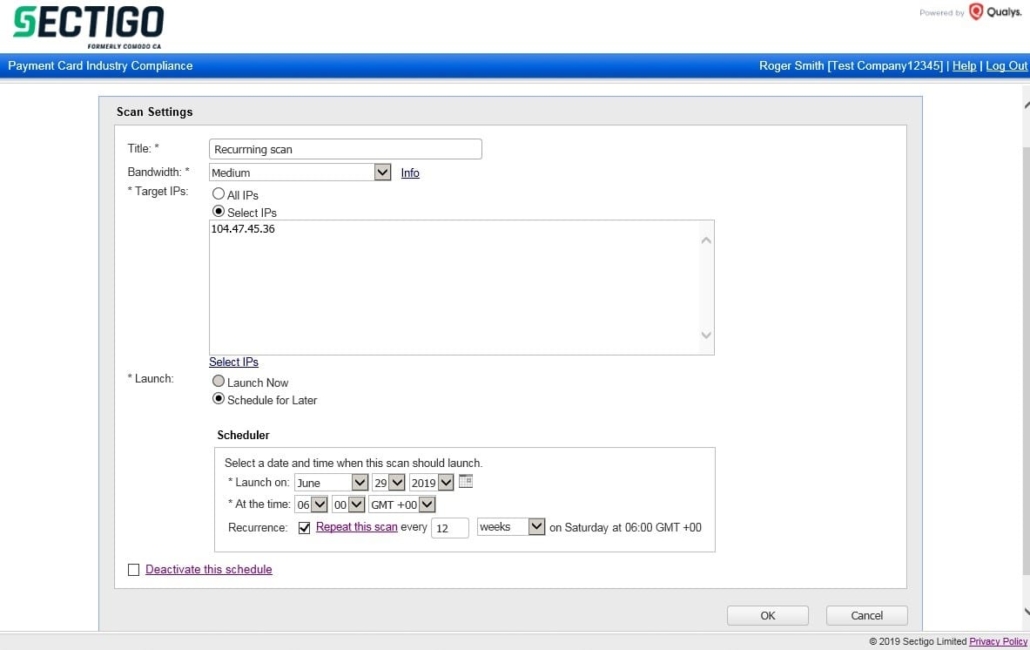
Within the HackerGuardian portal a scan schedule can be created by either clicking on “Network” then “Scheduled Scans” then “New Scan” or by clicking on “Network” then “New Scan”. On the “New Scan” page the “Schedule for Later” must be selected to schedule the scan. The launch date and time must be specified, and the scan can either be a single occurrence or scheduled to run over a recurring period. A minimum recurring schedule is a daily scan and maximum is a scan every 13 weeks.
Existing scan schedules can be viewed, edited, and deleted on the “Network”, “Scheduled Scans” page.
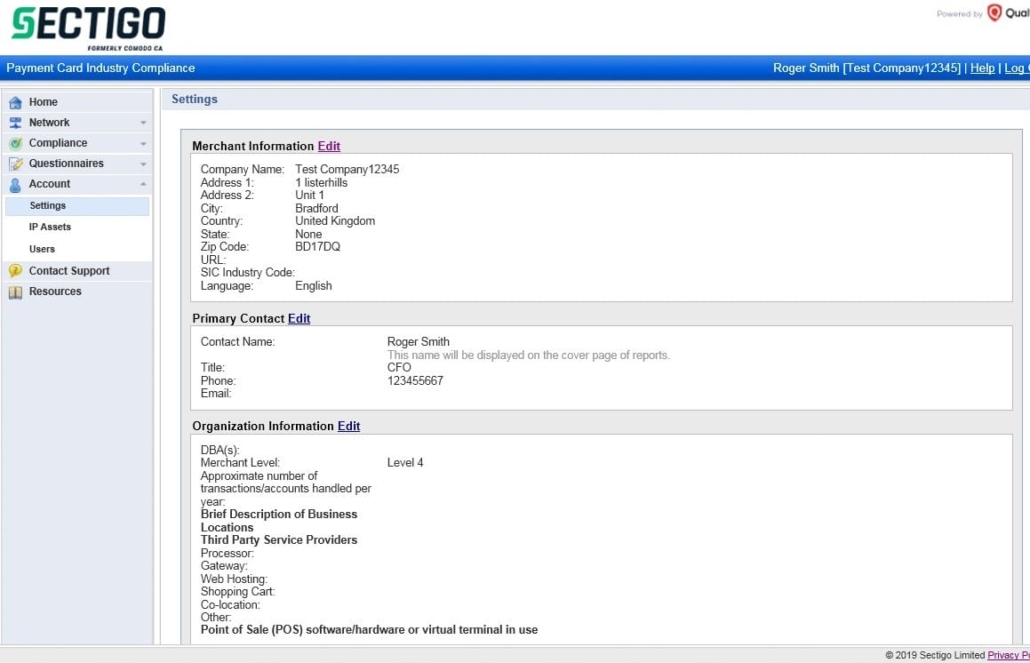
Update Account Details #
Alter account settings from the Web Comply portal by clicking on “Account”, “Settings” then the “Edit” link for the appropriate section. Contact Support to alter the company name.
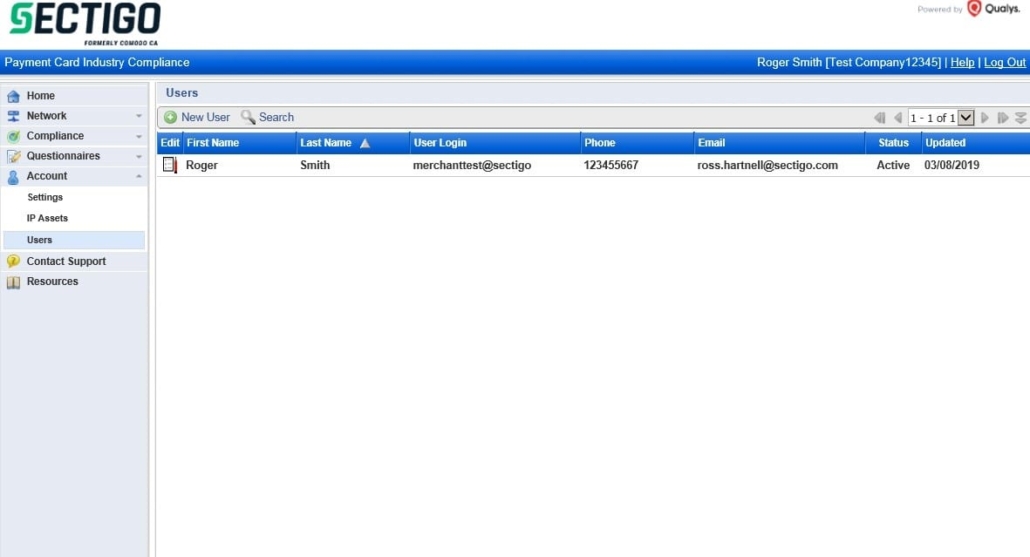
You may create additional user logins for employees in your organization so they may also run scans and view the reports. An additional user may be added by clicking on “Account” and “User” then “New User”. After adding a new user an activation email will be sent to their email address. After activation, new user may access the portal using their credentials.
Customer Actions #
- Direct scanning is not enabled by default so please contact your Product Support to have “scan by DNS” enabled on your account.
- Scanner IP Address range: 64.39.96.0/20 (64.39.96.1-64.39.111.254). The new scanner address range should be whitelisted when scanning through the new portal.
- A detailed explanation as to why a reported vulnerability is a false positive or description of the compensating controls implemented must be provided. The submitted information is reviewed by an ASV Qualified Employee before being accepted or rejected. If accepted the vulnerability no longer affects the report status.
Contact Trust365 Support #
Raise a ticket at www.trust365.com/support, email us at support@trust365.com or contact our UK-based support team by phone on 0808 196 8365 (option 2) during business hours (Monday to Friday 08:00 until 20:00 GMT).


